
Create a Map with the Die Drop Method
A fun way to flesh out your setting and generate a map by interpreting the positions and results of rolled dice on paper.

Introduction
I’ve been developing a game for some time now and have to start playtesting it. Before I introduce it to other people, I would like to do a solo run or two to identify some of the more immediate issues. I’m still very new to solo play and find it a little difficult - but maybe having a map with interesting places will be greatly helpful.
I have used the die drop method before and it works wonders for me. I did not invent it1 though, but here is my take on how to use the die drop method for making a map.
0: Setup
What you need: Dice, paper, and a pen.
Preparation: Make a couple of tables:
One for generating the overall environment.
One for different types of points of interest (PoI).
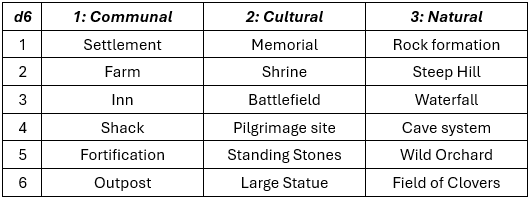
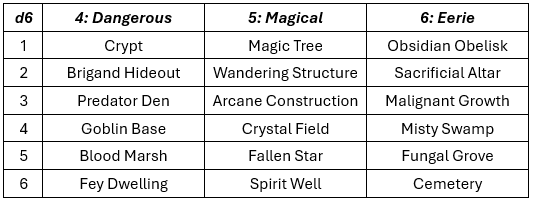
One table for each type of PoI.
I have made a group of tables for my setting, which I am going to use in this post. You are welcome to use them or modify them to your needs.
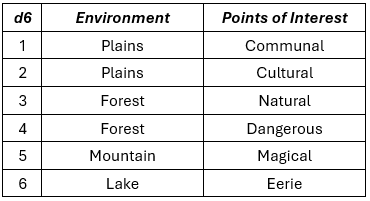
As you can see, the tables and their content imply alot about the setting. The environment table implies a somewhat boreal climate, and the PoI indicate a type of fantasy setting which is both fantastical and spooky.
By having a dedicated table for ruins, you know that the world will feature decaying remnants from previous civilizations.
When you design your tables, remember to have fun. They should inspire you while creating them. If you struggle with filling out each entry with interesting options, put in something trivial. You can always return to change it later - but even boring results might become interesting in the right context.
Before you roll the dice, decide on a scale of your map: how big is it? I decided that each hex on my map is roughly 5 km wide. This nicely coincides with 1 hour to cross a hex on foot.
1: Getting started with the Environment
We start by generating the environment. Grab a handful of dice and roll them on the paper. Each die represents a type of natural environment corresponding to the entries in the Environment column. The more dice you take, the more varied the environment will be.
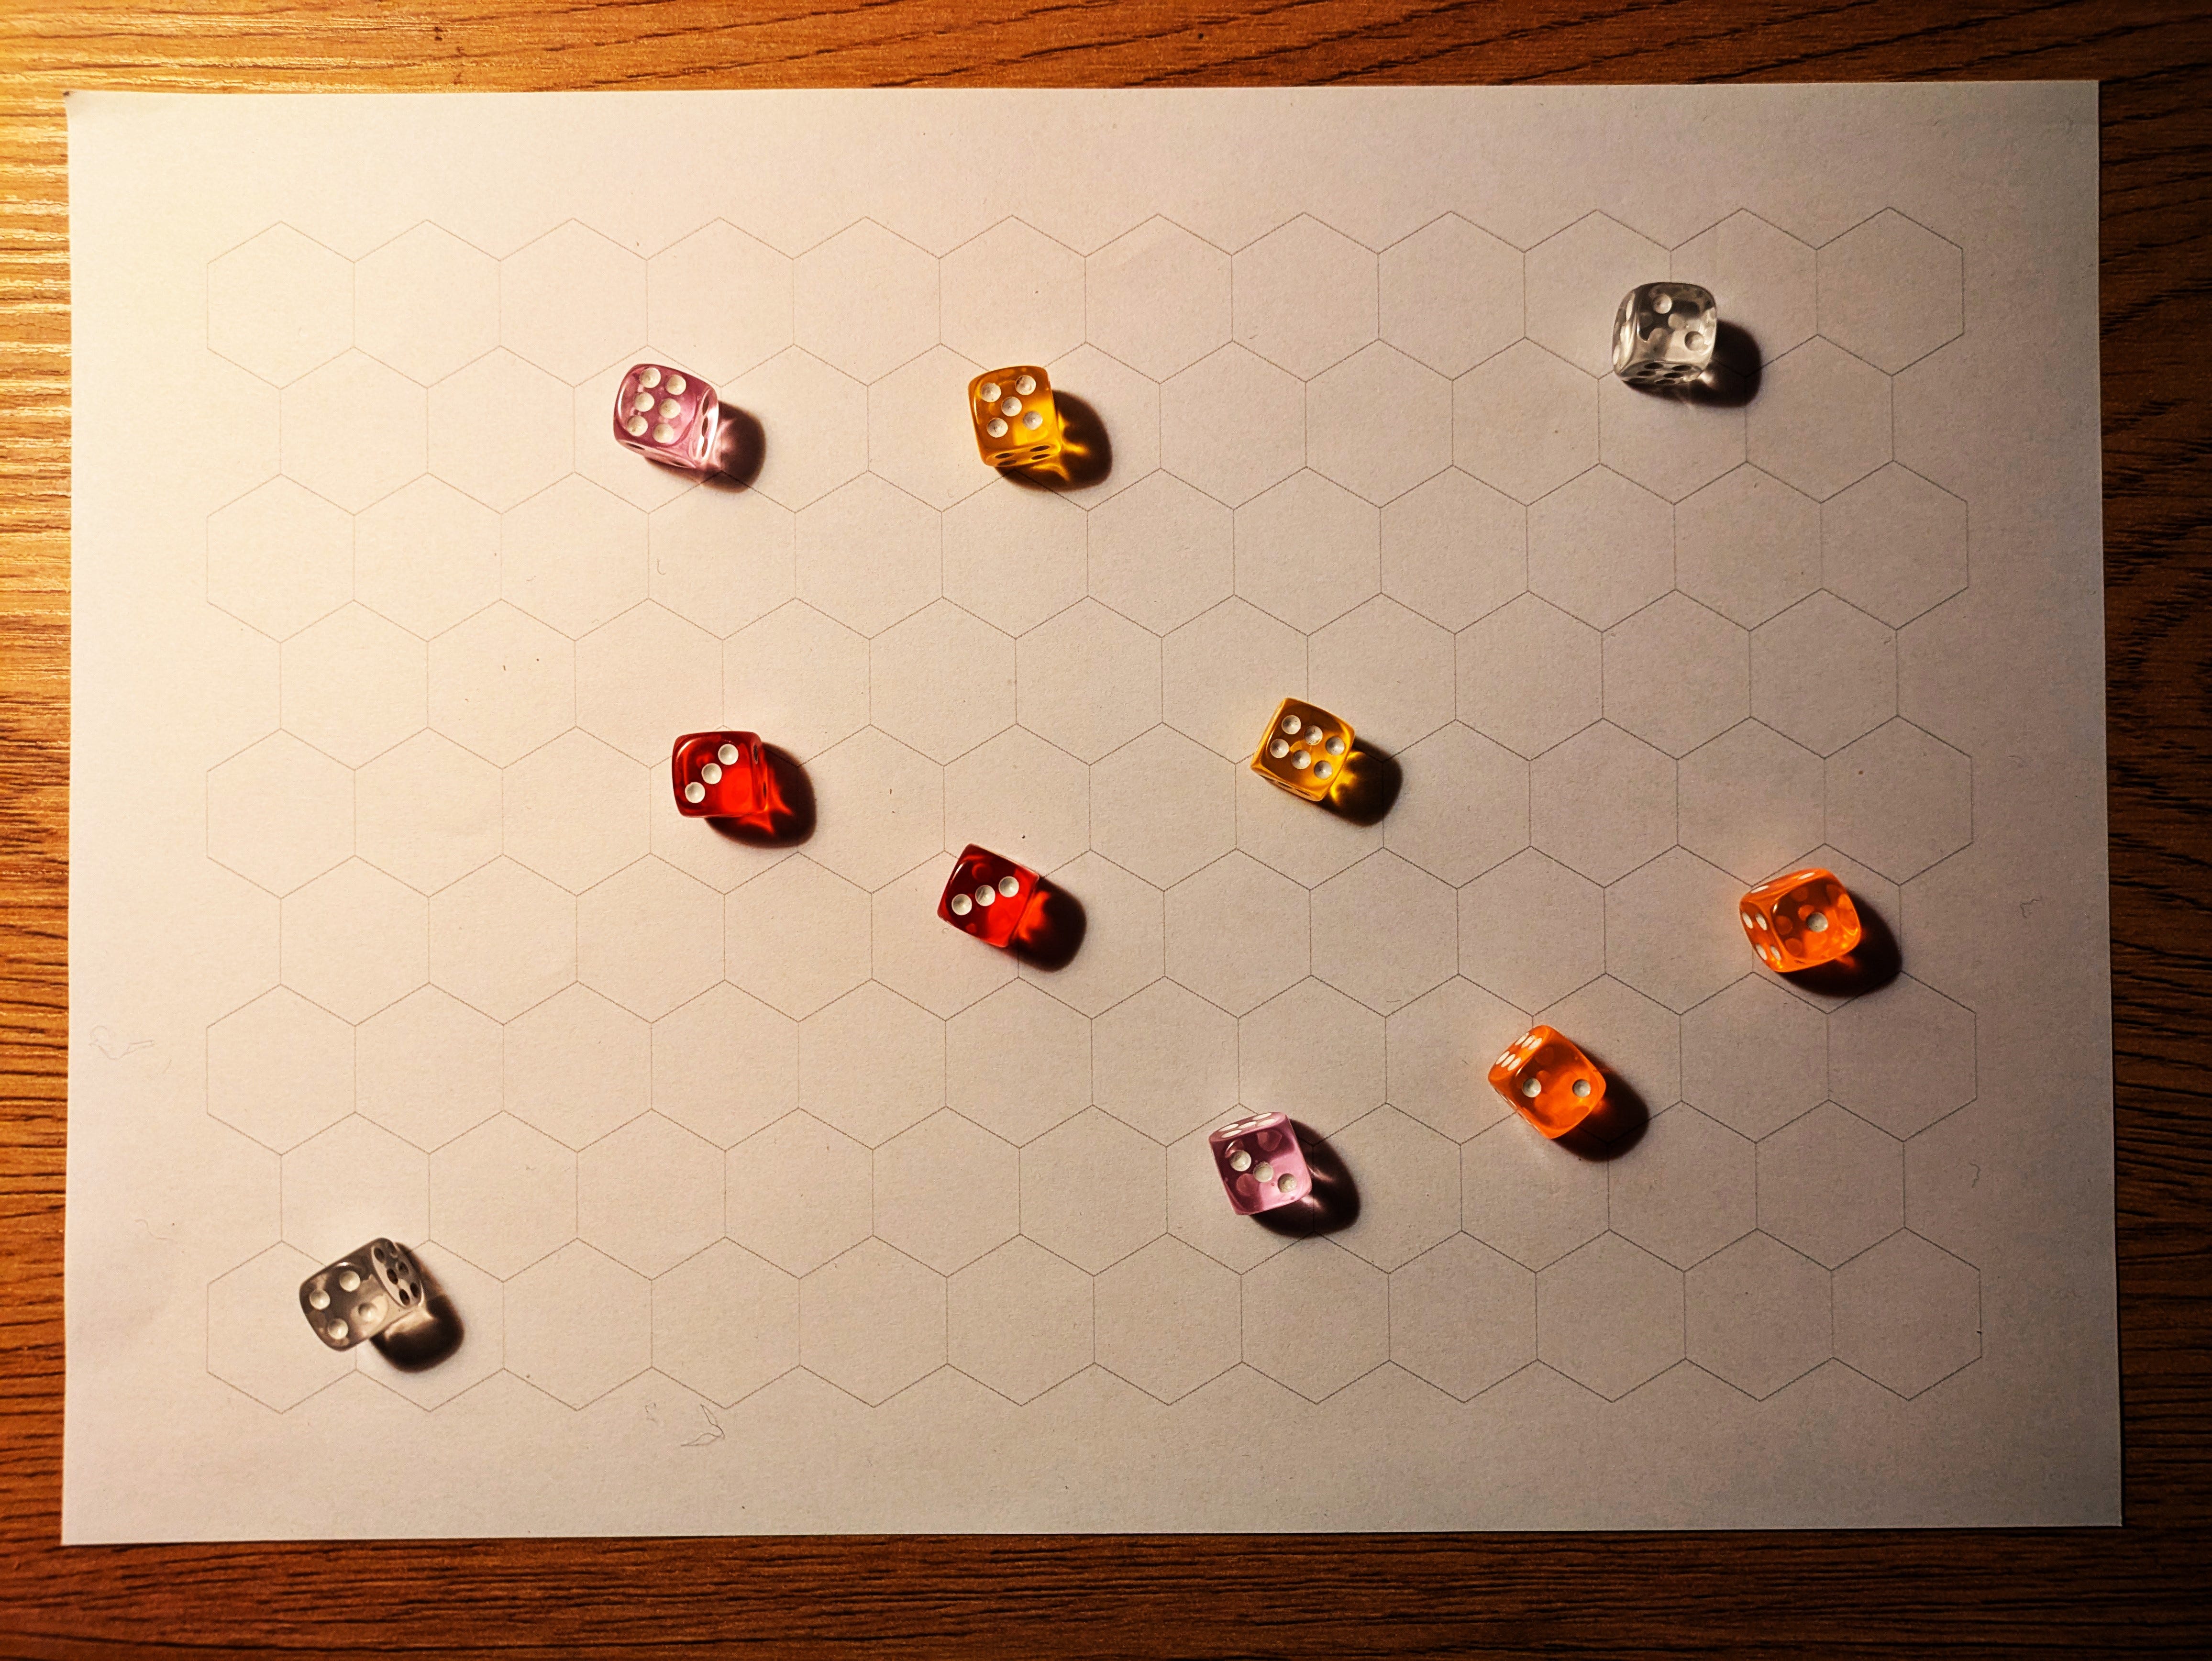
Inspect the results, picture the lay of the land, and make some sketches around each die. I ended up with a large swath of forest (3s and 4s) in the bottom left corner, mountains (5) in the upper middle surrounded by lakes (6s), and plains (1s and 2s) on the right side:
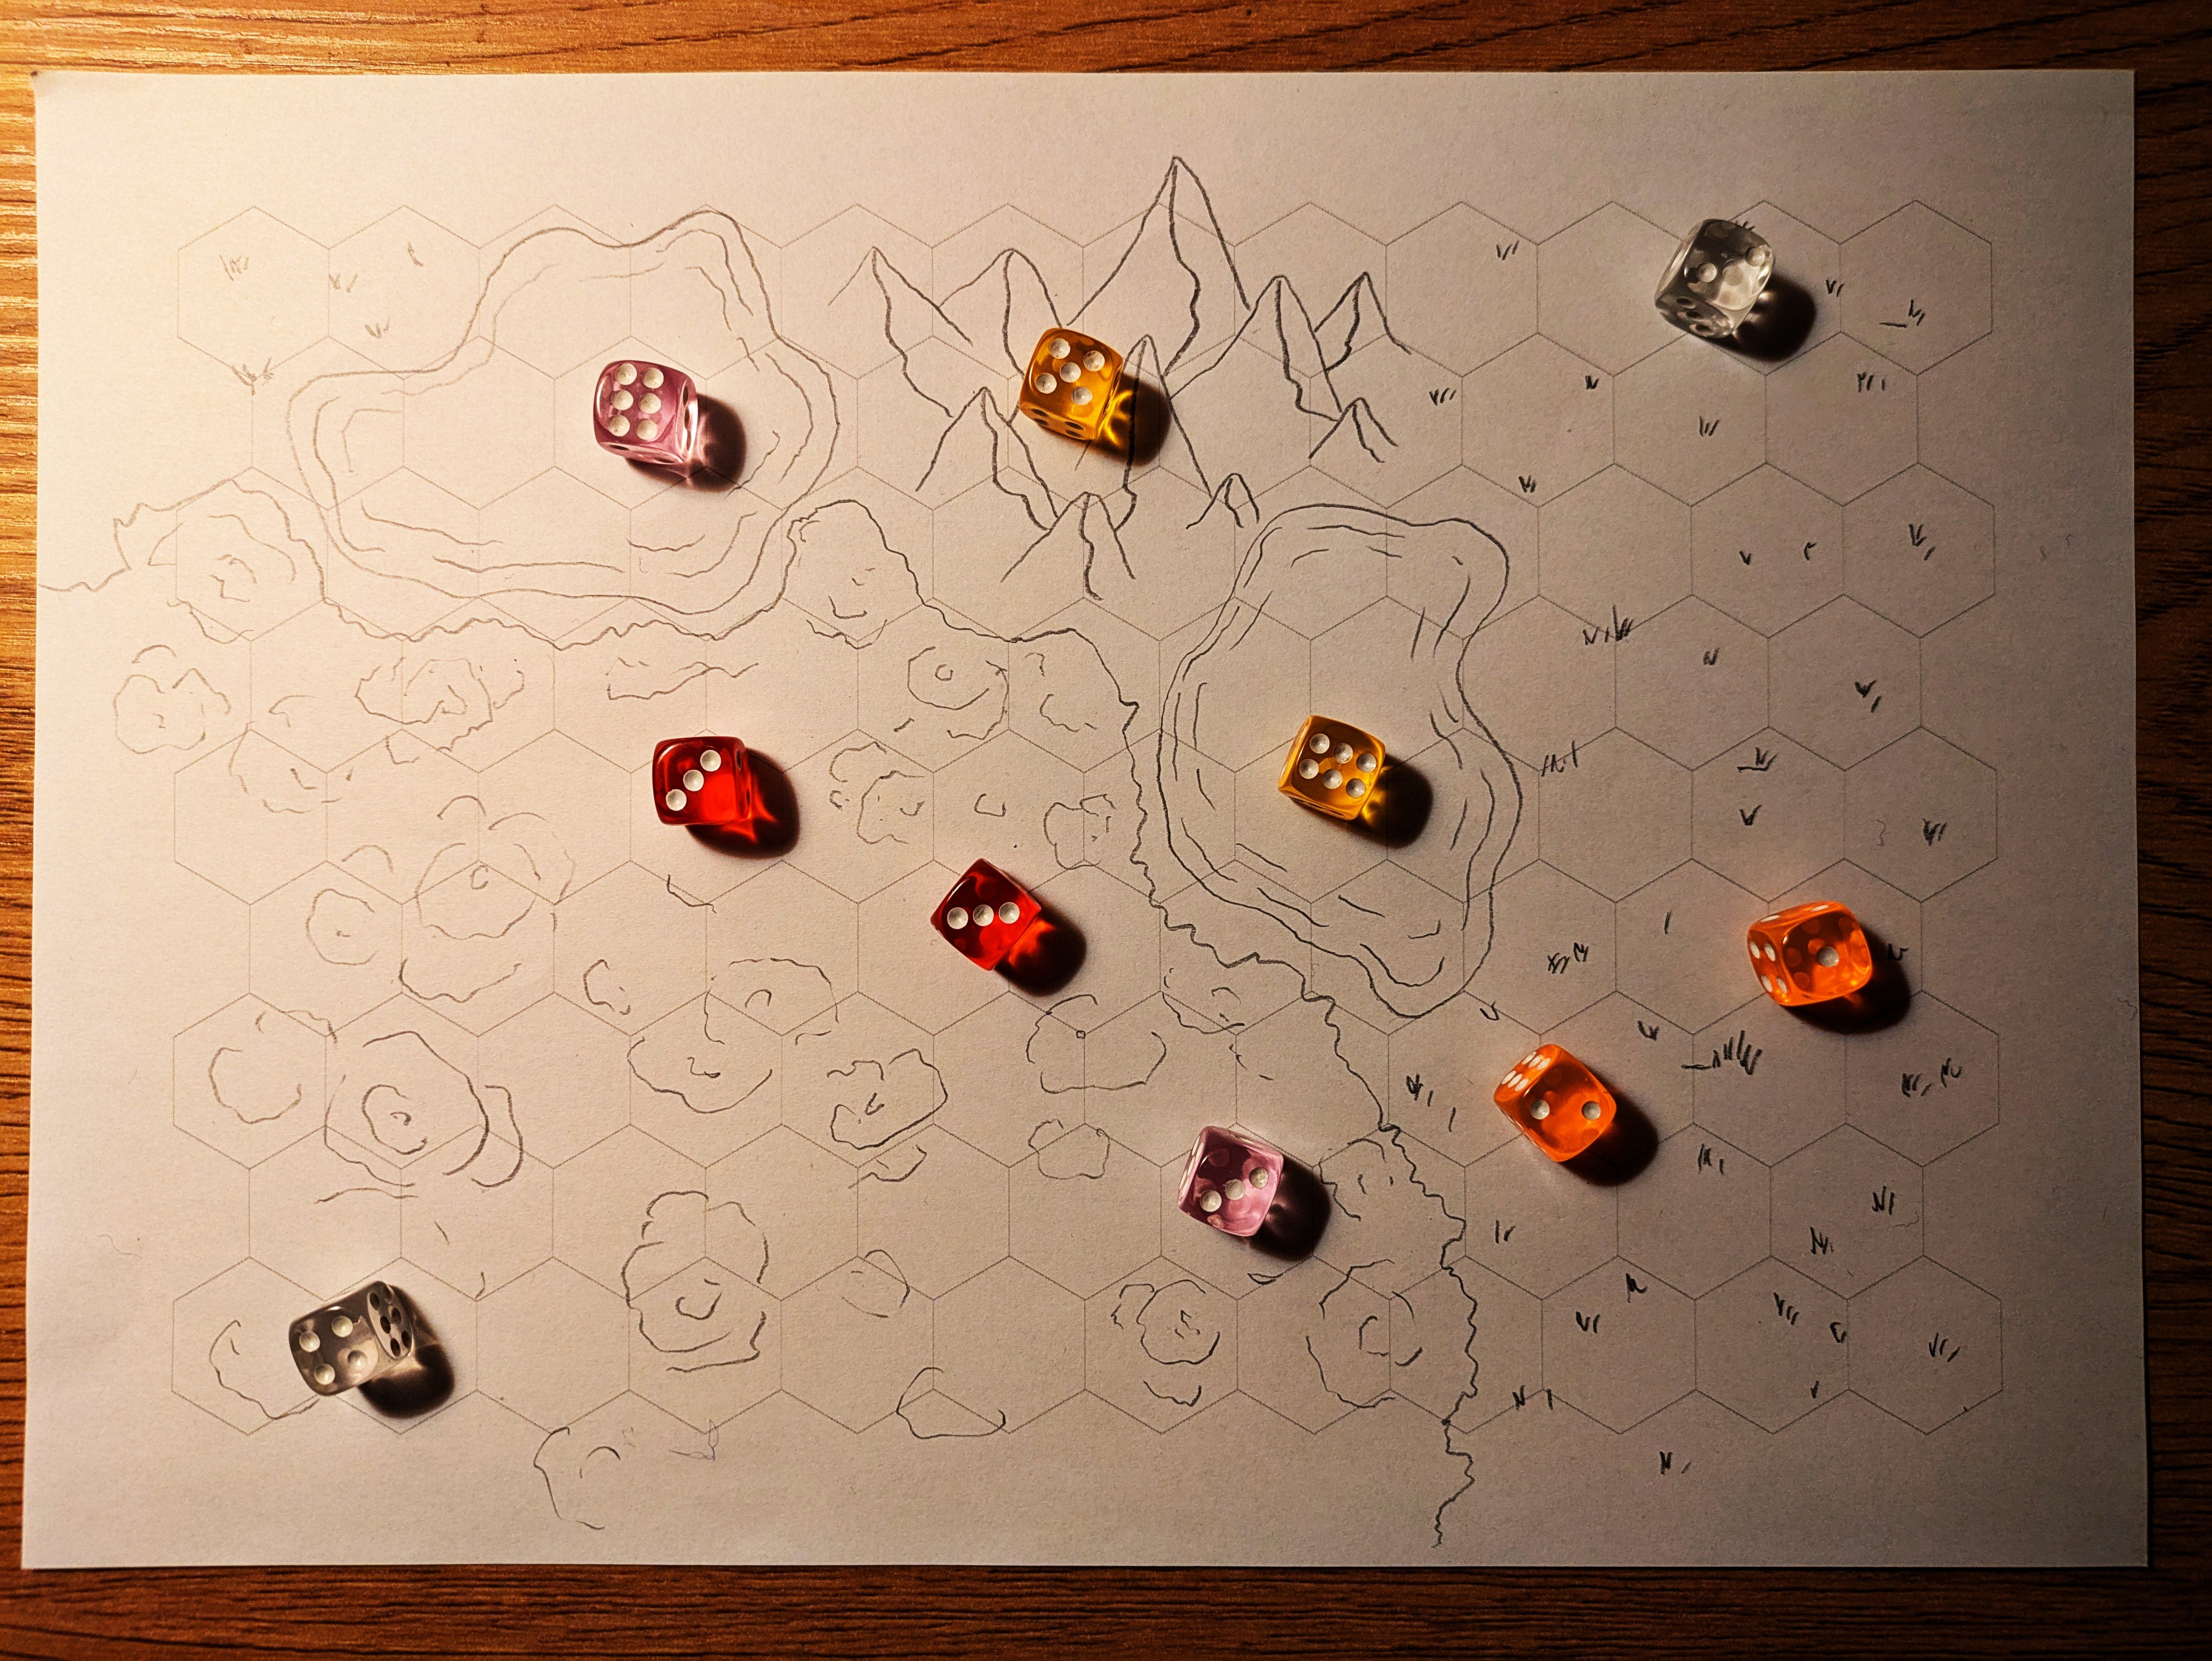
Don’t be afraid to modify the results (but try to trust the process). As my game will center around port towns, I decided to draw some shores along the borders of the map. This made me think that the left lake would make more sense as a lagoon. The map is pretty bulky right now, but its fine. Once the sketch is complete, I can always re-draw it and make adjustments to make it look more natural if I feel like it.
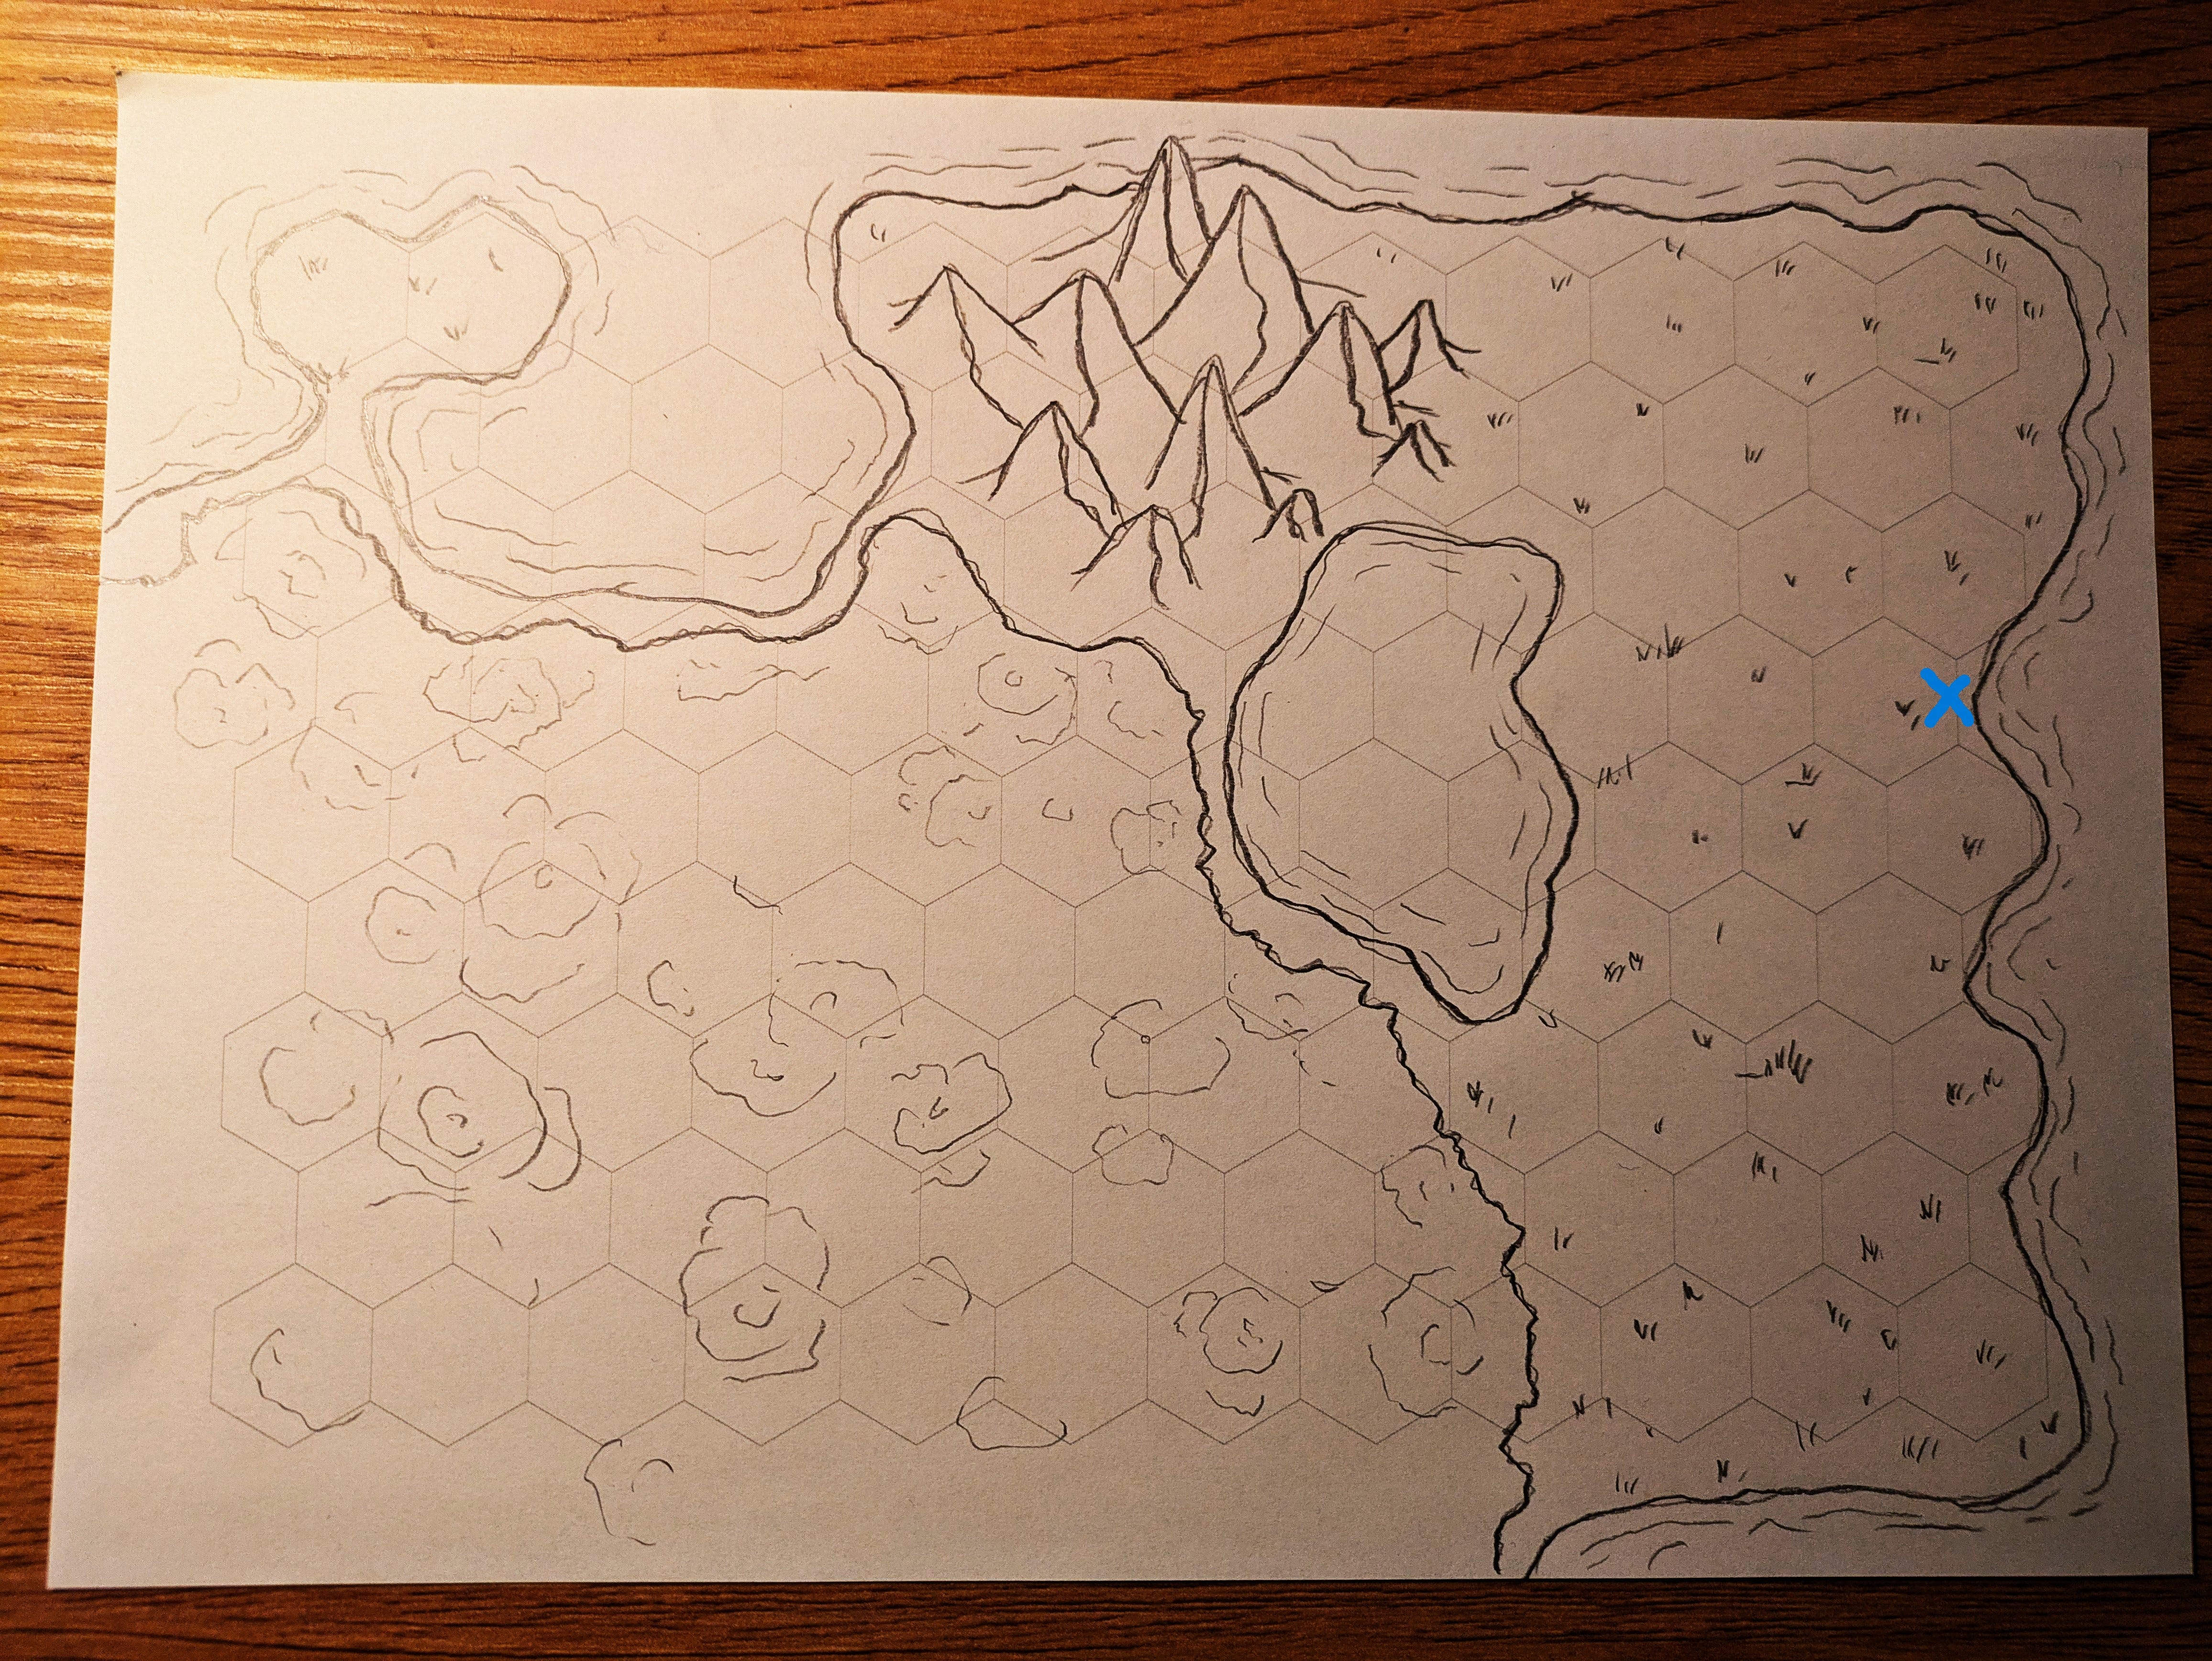
Before I rolled any PoI, I decided to put the main Port Town on the map by the blue X.
I picture the plains as rolling hills of grass and the occasional tree. The lake is clear and glistening, and the giant forest is mainly deciduous, deep, dark and gnarly with twisting paths. The mountains are tall with patches of coniferous woods among their snowstreaked peaks.
2: Create Points of Interest
Time to generate the individual locations on the map that characters can discover. The more dice you roll, the more crowded your map will be. Consider how large it is; as each hex on this map is 5km, I feel it is appropriate to have some space between each PoI.
The more PoI you have, the more time youwill need to flesh them out. Think about the scope of your adventure or campaign, and how much work you need to do to get started with playing. The fewer places, the more likely your players will encounter them.
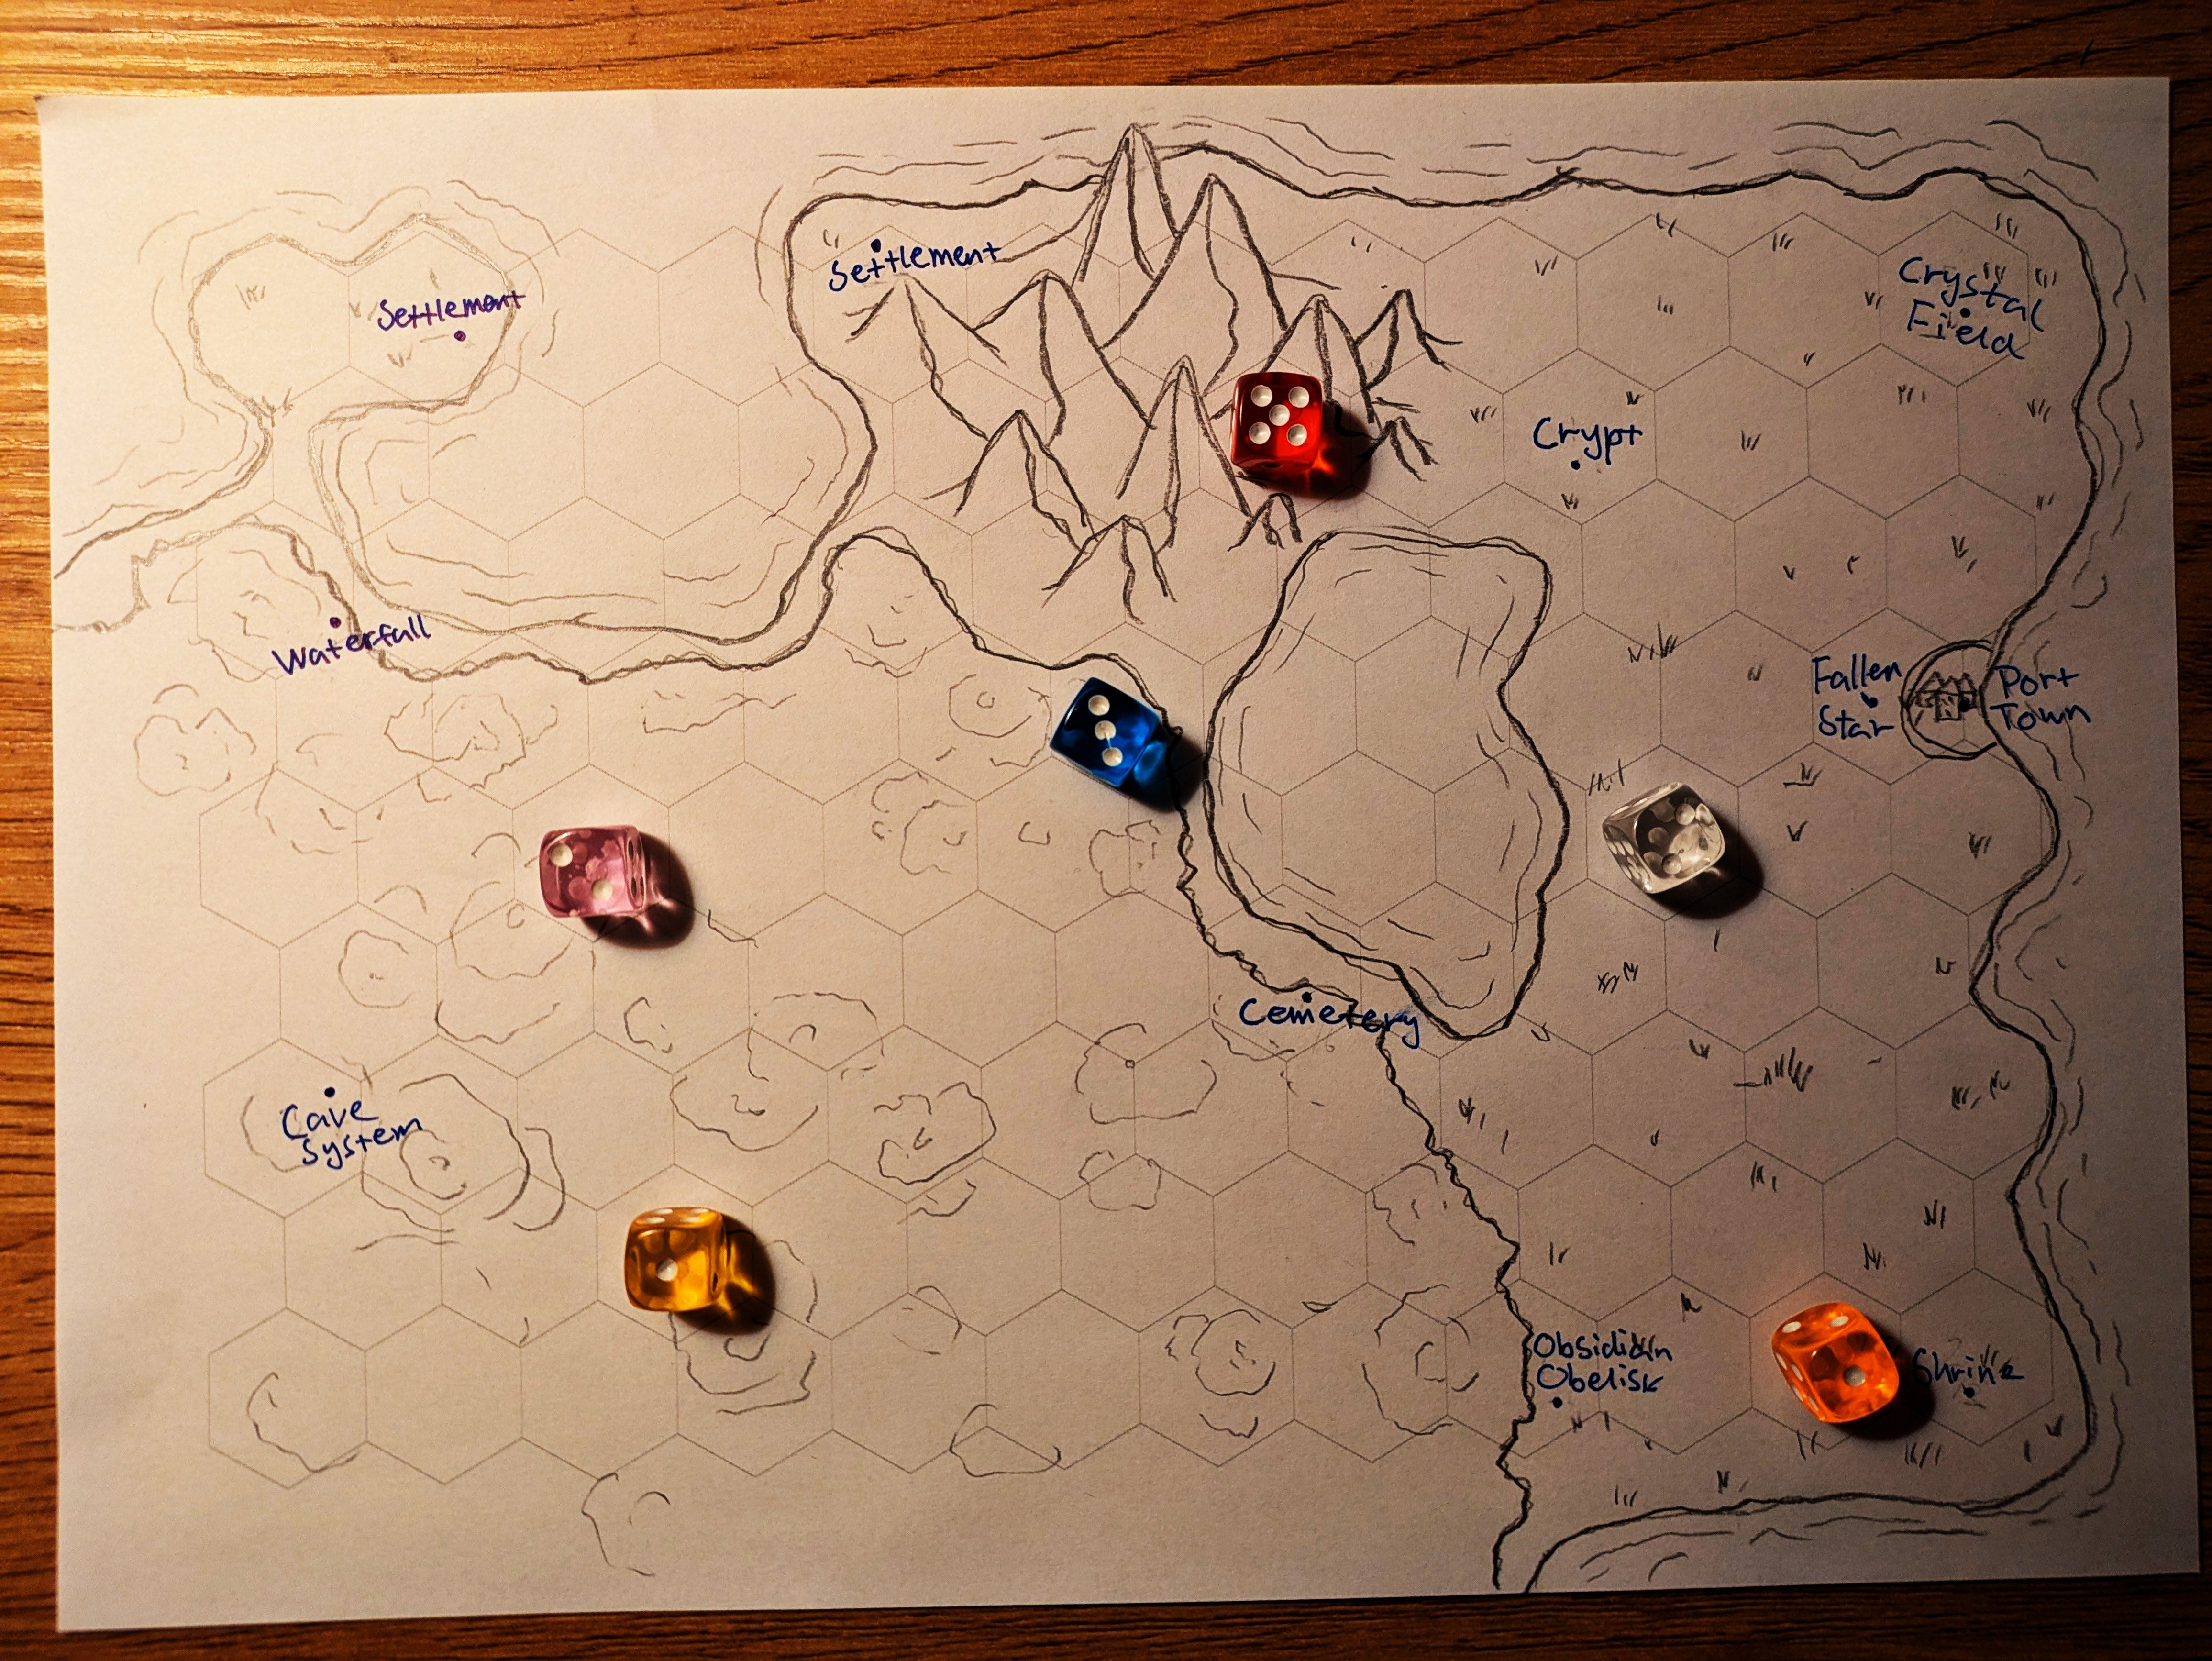
Roll the dice and note what type of PoI each one is.

Next, roll a die for each PoI and note its particular content according to their respective table. For example, the pink die in the bottom right corner is a 2, which is a Historical PoI. I roll another die and get another 2, a shrine.
Write down each final result like this in the respective locations:
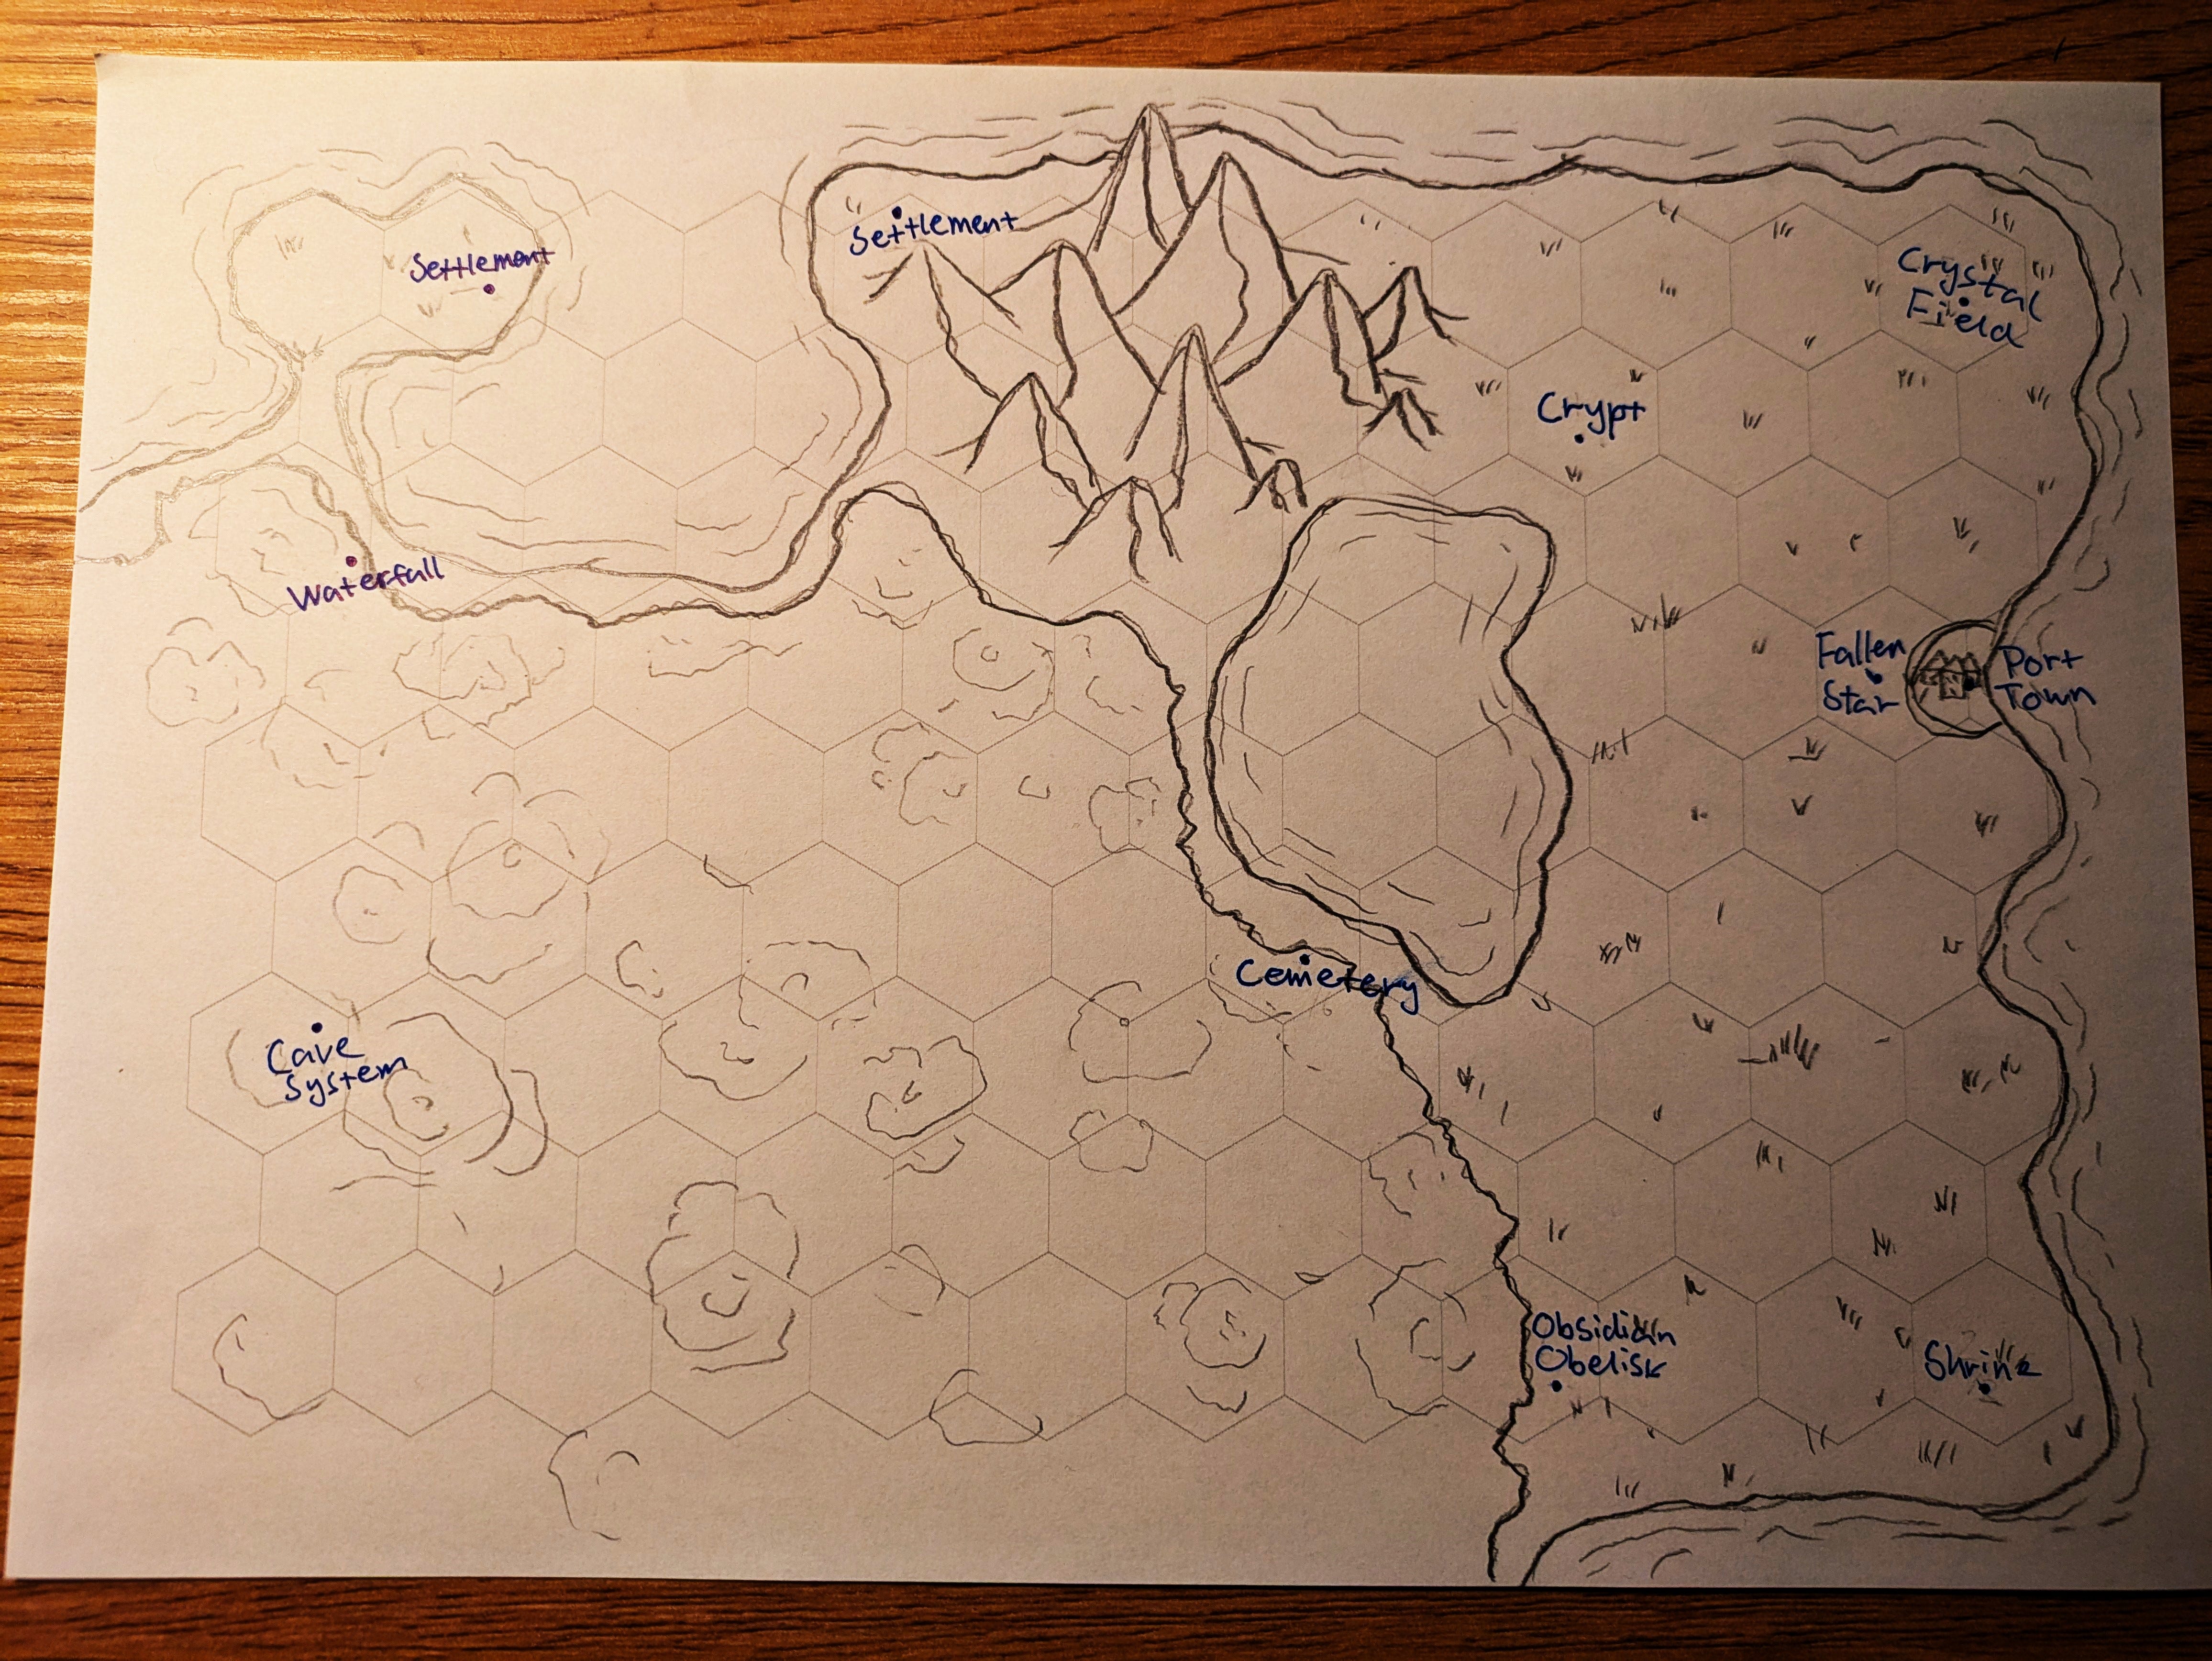
I like the result, even if its surprisingly mundane compared to the tables.
That fact that a fallen star is right outside the town is perfect. Perhaps the inital settlers saw it strike the land as they approached from the sea, and took it as a sign. It will definitely be important to the town.
The shrine at the buttom right is a great reason for pilgrims to leave the town, and the obelisk to its left ominously mirrors it - they probably have some connection. The crystal field to the north of the town could be mined for export, or perhaps it is avoided for mysterious reasons.
The crypt to the north west is definetely a dangerous place and could pose problems for travelers and pioneers - great for initial conflict and adventure.
A cemerety bordering the forest and the lake in the middle of the map is a great view.
I love the waterfall overlooking the bay. The two settlements on each side of the bay is pretty interesting. Both settlements are also surprisingly remote and inaccesssible save from boat. What is their relation with each other - and with the larger port town?
A mysteries cave system deep in the forest has to have great treaure or power - good for rumors and expeditions.
We already have a foundation for multiple sessions of play, but I want to add some ruins
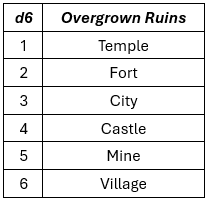
3: Generating Ruins
Having a table that guarantees a specific type of location can help create some consistency in your game. It doesn’t have to be ruins. You can also use any of the other PoI tables, like the Magical table, if you feel like something is lacking, or if you want to have a particular type of PoI shine through.
Let’s see what we get:
I follow the same procedure as when I generated PoI: consult the table and note down the results.
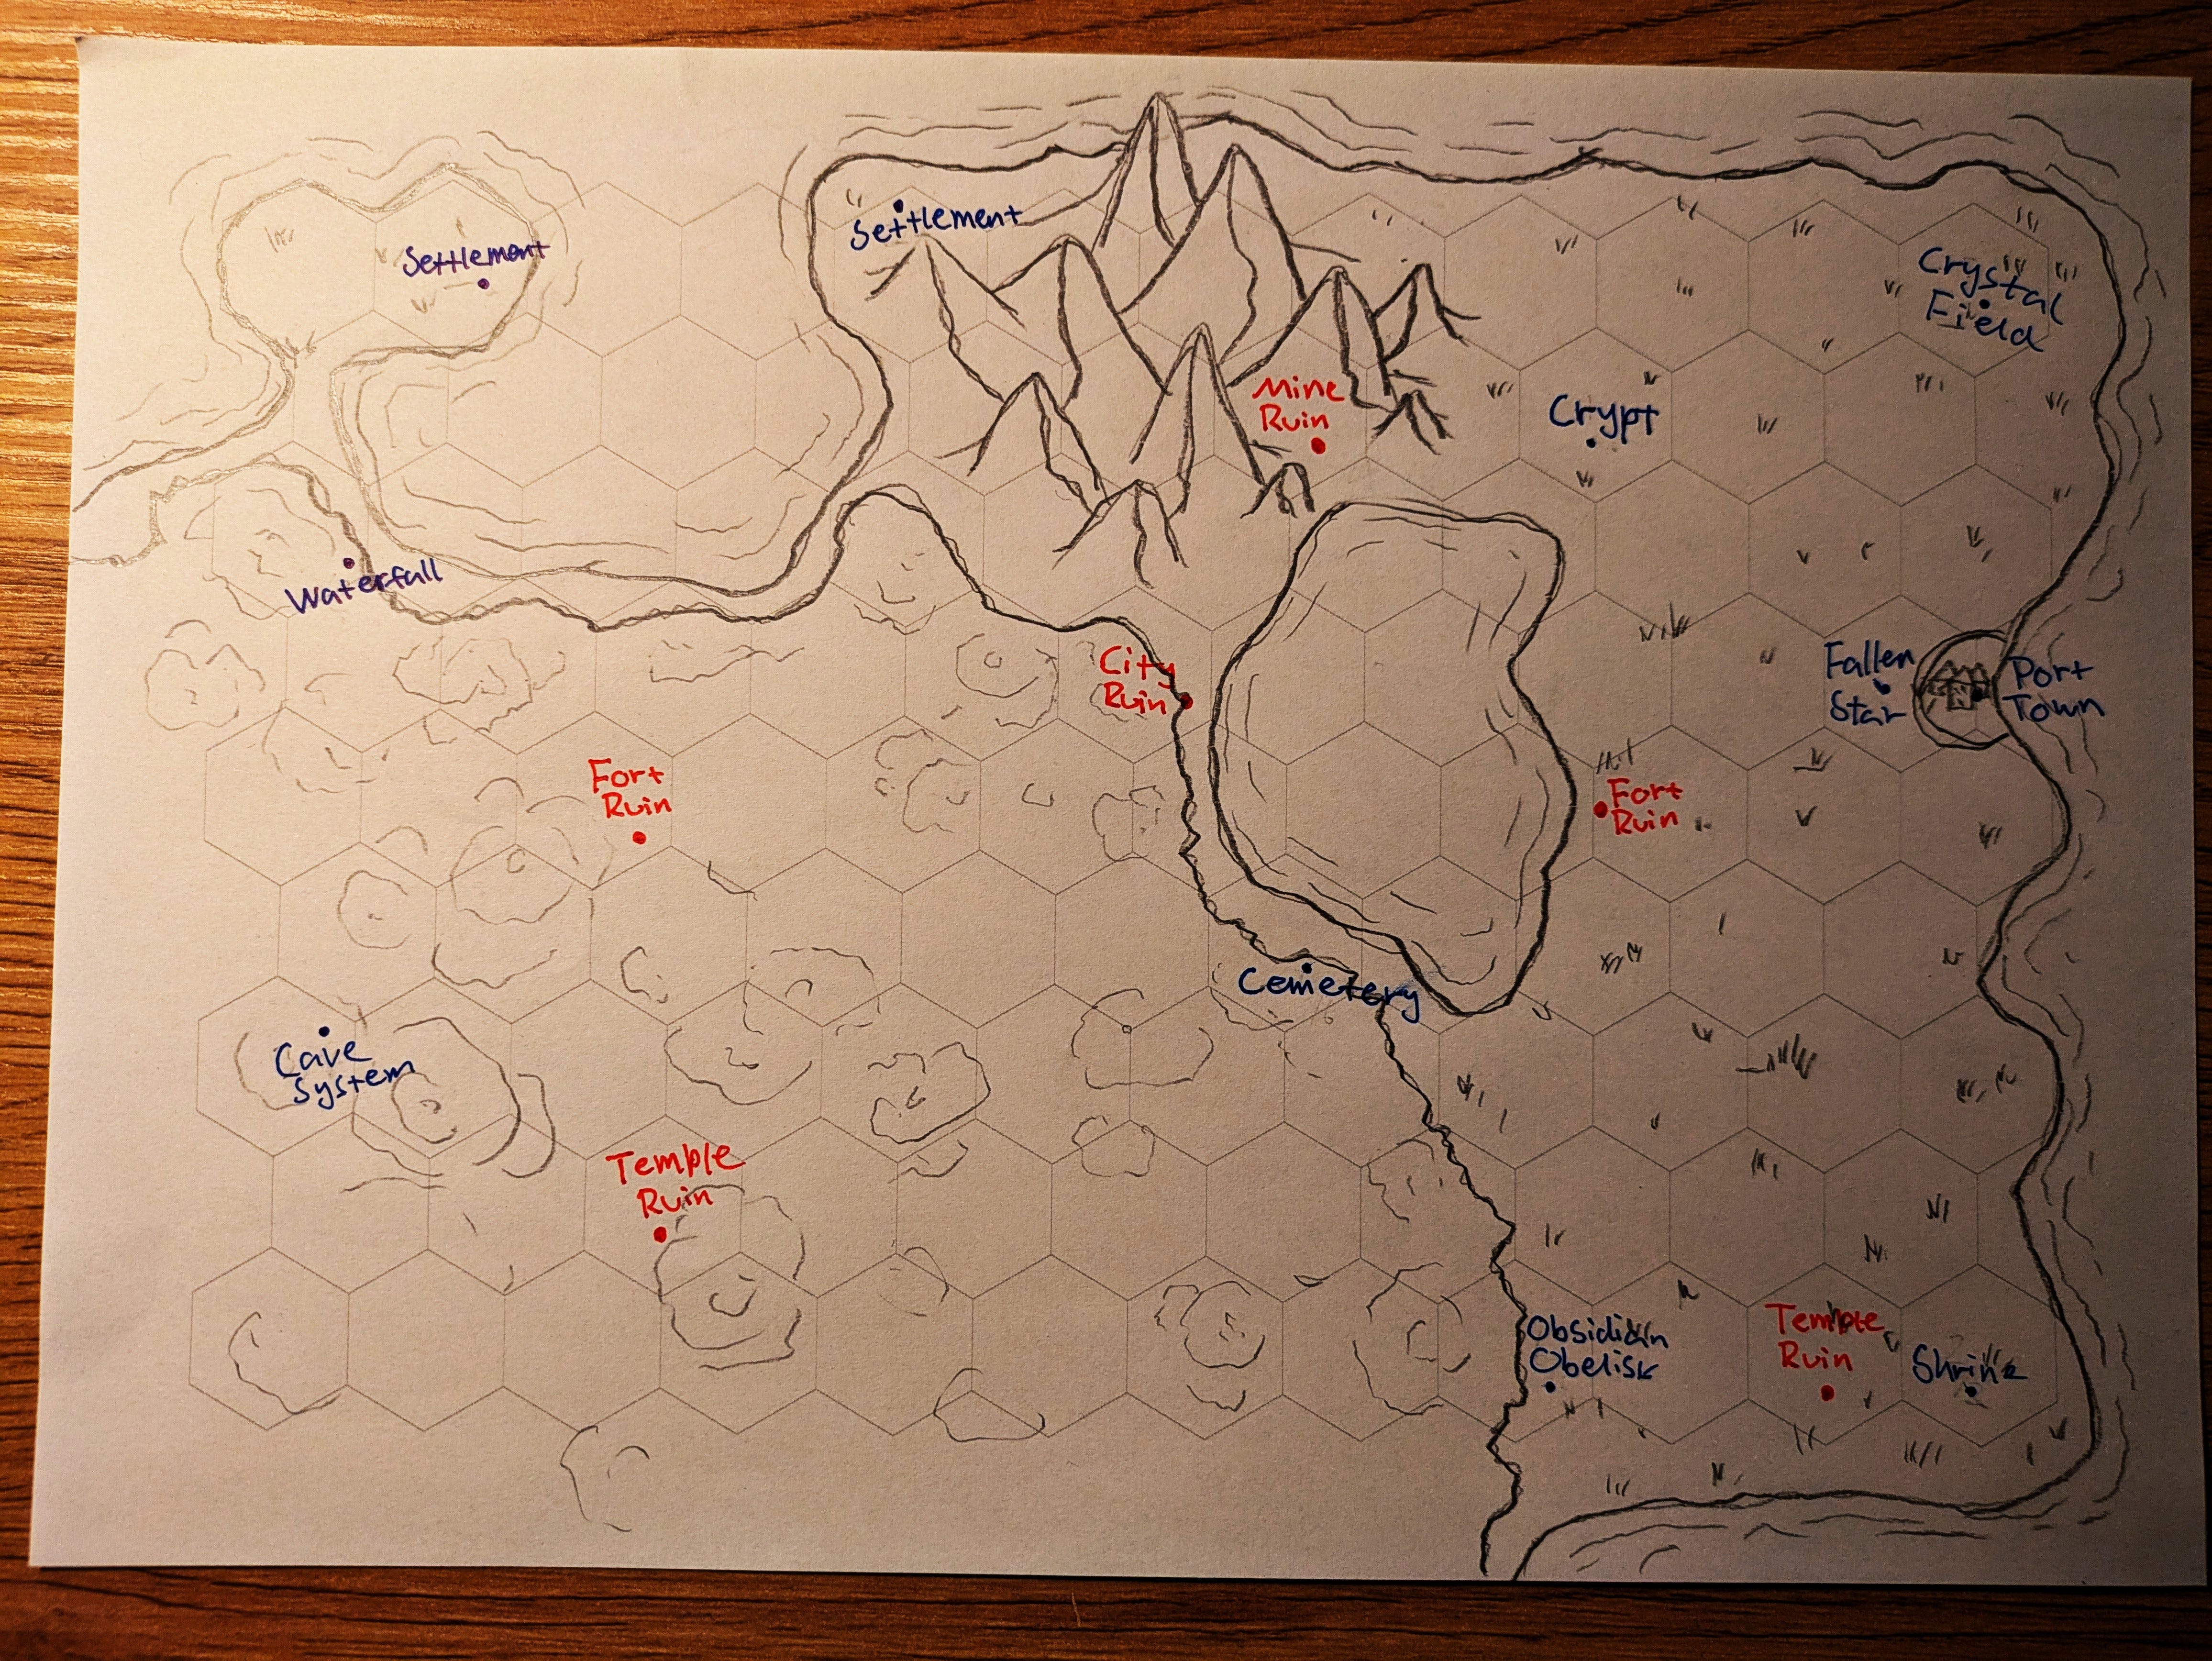
Note how some of the results make immediate sense.
A ruin mine in the mountains is perfectly sensible, and a great adventure location.
A temple ruin between a shrine and obelisk feels quite natural.
The city ruin is in an obvious important location between the forest, lake and mountains. Maybe the city used to haul stone and precious metals from the mine?
The fort by the lake is also conveniently close to the city, 10-15km: far enough that you need to want to go there, but close enough that you, and probably many others, can. What dangers lurk there? What promises? Maybe the ruin city and the cemetery can be seen from the top of the fort on the other side of the lake. Are they connected?
A temple and ruin fort deep in the forest is great for excursions into the deep dark weald.
Final Notes
I love this approach to mapmaking. After you have made your tables, the map basically makes itself. When the results seem out of place, it makes me think: interesting, what surprising reason is there for this constellation? Figuring out how to fit things together is like a puzzle, and is to me as interesting as when the results match each other perfectly.
Rolling a new map with the same tables can generate some vastly different combinations while keeping the overall setting consistent.
The tables alse serve as a template for your setting. By having them, you can easily expand the map. You can add more locations between play sessions by dropping new dice, or just peruse the tables for options that havent seen use yet.
Stay around for the next post where we will add details to each location.
Other blogs talking about die dropping: How to Make a Drop Map at Gnomestew; Simple Die-drop Dungeon by Tam H; Die Drop World by Joseph Krausz.